Reading time: 5 Minutes
Integrate Shopify with QuickBooks Online (QBO) empowers merchants to streamline their accounting processes and generate detailed financial reports tailored to their business needs. This seamless connection saves time and provides invaluable insights to drive smarter business decisions.
By linking Shopify with QuickBooks Online, you lay the foundation for creating customized financial reports. This integration automatically transfers sales, inventory, and customer data between the two platforms, reducing manual data entry and minimizing errors.
Steps to Integrate Shopify with QuickBooks Online
1. Choose the App and Add it to Shopify
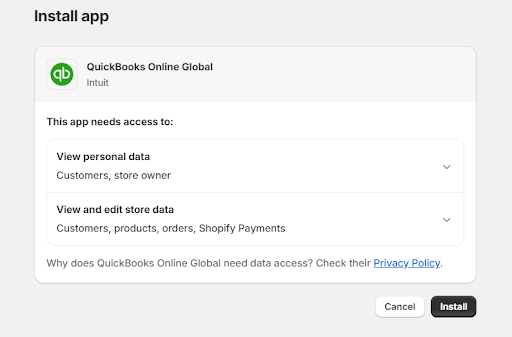
Start by selecting a third-party application, such as QuickBooks Online Global, from the Shopify App Store. These tools simplify the process by summarising Shopify transactions and syncing them seamlessly with QuickBooks Online.
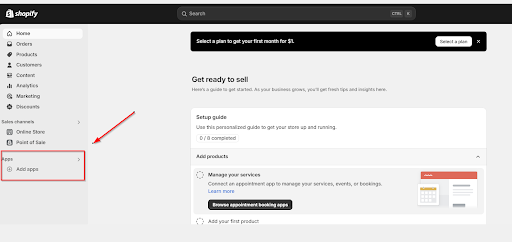
Select and install the app.
You may also browse the list of third-party apps in the Shopify app store here.
2. Set Up the Integration:
Install the chosen app and link your Shopify store to QuickBooks Online. Select your organisation to connect.
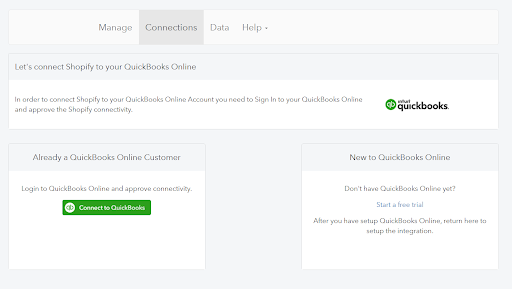
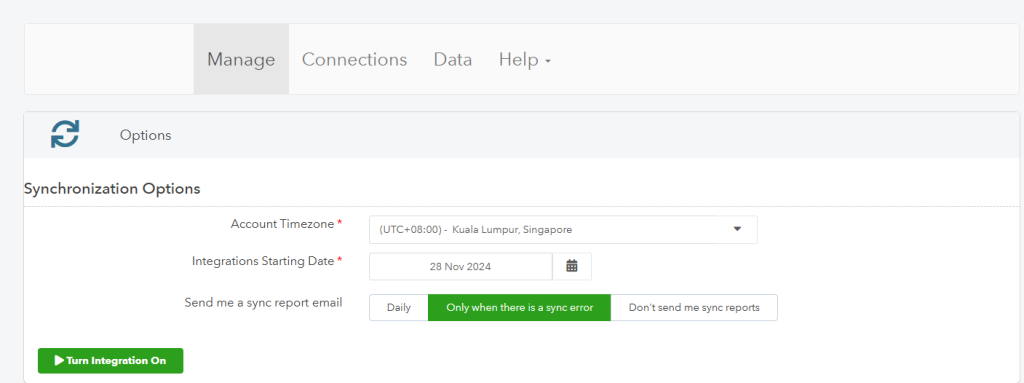
Once your organisation is connected, you may start configuring the synchronisation and select “Manage.” You may choose the Timezone, report email setting, and when the integration shall commence.
3. Configuration Settings for Shopify-QBO Integration
With Shopify integration, you can configure four key settings based on your business model and transaction flow.
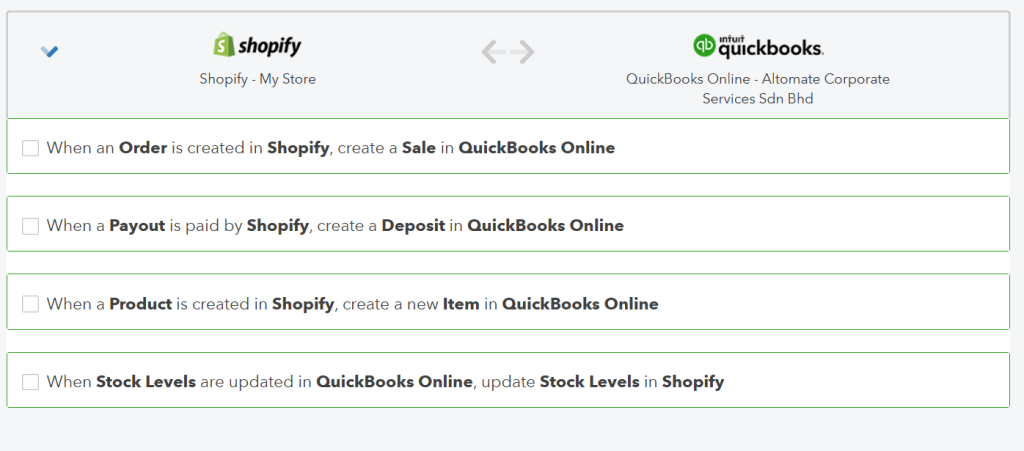
a. Sync Orders from Shopify to QBO
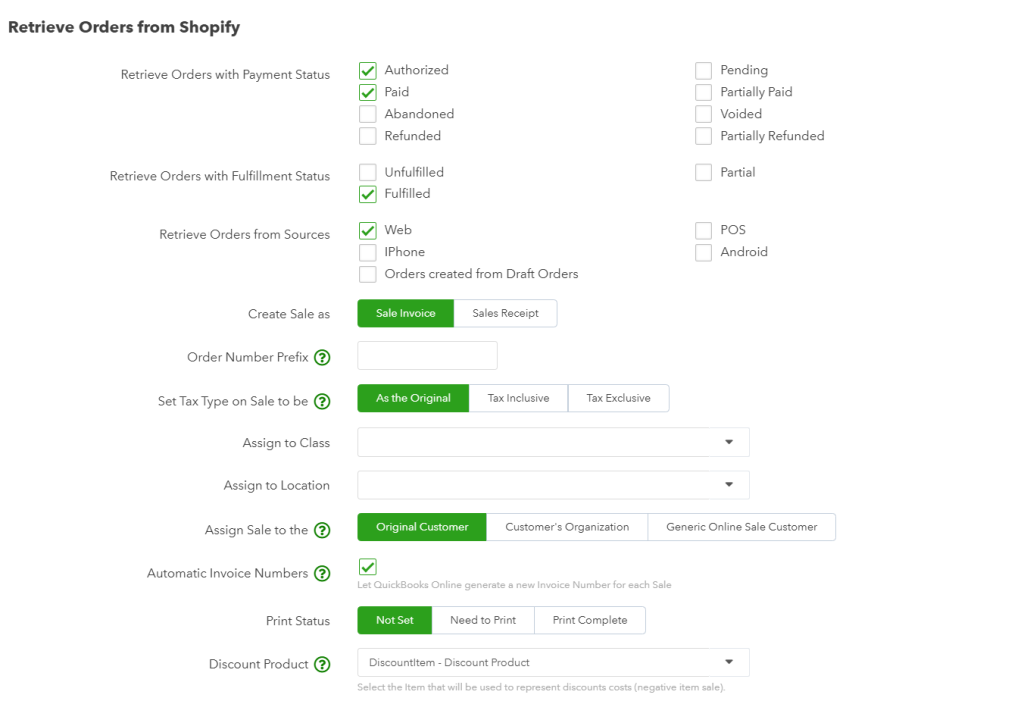
You can choose which orders to sync based on:
- Sources (e.g., online store, POS)
- Payment Status (paid or unpaid orders)
- Fulfillment Status (fulfilled or unfulfilled orders)
You may also configure QBO to create either a Sales Invoice or Sales Receipt. Additional configuration options include:
- Setting an Order Prefix and automatic Invoice Numbering in QBO.
- Tracking transactions by syncing custom tracking fields from QBO.
- Defining default settings for Tax Type, Discounts, Due Dates, Shipping Terms, Rounding, and Tax Code.
You may set a simple setting below for a simple e-commerce web store.
Example:
Upon successful integration, you will see entries in QBO for orders synced from Shopify, such as:
| Dr Trade and Other Receivable XXXX Cr Sales XXXX |
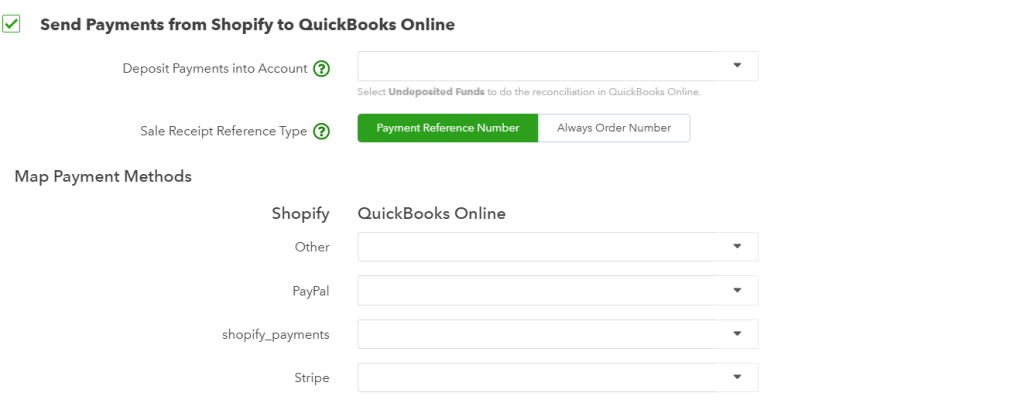
b. Sync Payments from Shopify to QBO
Create a Clearing Account in QBO and map payment records from Shopify to QBO. For advanced settings, assign specific clearing accounts for each payment type (e.g., Stripe Clearing Account).
Example:
| Dr Stripe Clearing Account XXXX Cr Trade and Other Receivable XXXX |
c. Automate Credit Note Creation in QBO
Configure the integration to automate the creation of Credit Notes in QBO for refunds. Set up a fallback account for these transactions.

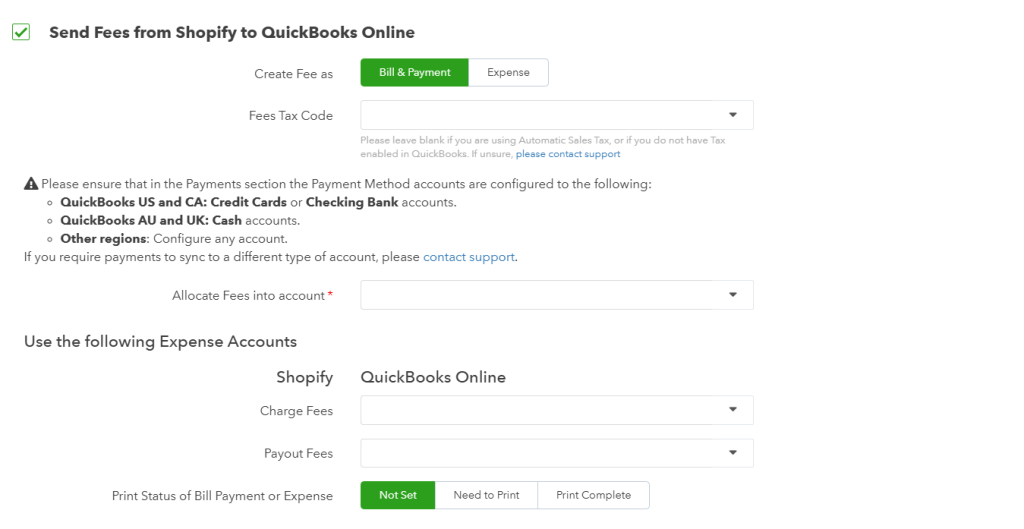
d. Record Shopify Fees as Expenses in QBO
Configure Shopify fees (e.g., charge fees, payout fees) as expenses in QBO by assigning them to appropriate expense accounts.
4. Review Your Integration
Once the integration is complete, you can effortlessly view your orders, payments, and other transactions in QuickBooks Online.
For instance:
- Orders will appear as Sales Invoices or Receipts.
- Payments will reflect in the configured clearing accounts.
- Shopify fees will be recorded as expenses.
For advanced customisation and expert support, contact Altomate today to learn how we can help optimise your business operations. From company incorporation and payroll management to tax compliance, bookkeeping, and seamless platform integrations, Altomate empowers businesses to operate efficiently and focus on growth.


